Human ears are one of the most important features of the face. one must learn how to draw ears because When it comes to drawing a portrait, it must be drawn carefully. In this blog I have given step by step pictorial illustration and also a Video tutorial at the end. Drawing ear is very simple only if you practice more of it.
Before we begin to draw. Let’s understand the high level structure of the human ear. The shape of ear varies from person to person but the basic formation of each ear remains the same.
we should focus on below points from drawing perspective.
Helix
Antihelix
Tragus
Anti-Tragus
Lobule
Step 1: Drawing ear outline step by step
Follow the below step by step illustration for drawing ear (profile view).
Based on the reference picture draw the for ear. Drawing lines should be light so that we can correct it easily when we make any mistake. Erase the unnecessary lines using the kneaded eraser.
Tip: Use an HB pencil to draw these construction lines
Using the same HB pencil, give a basic shading to the around the anti-helix and tragus. this will give the better understanding of the ear.
Tip: Don’t be afraid of shading, since we are shading in layer by layer. It will be easy to make any correction if required.
The darkest portion of the ear must be shaded using 8B pencil because it gives very good dark value. Also continue the shading around the ear as shown in the picture.
Step 2: Add details and shading
Ear has lots of skin folding, one has to be careful while shading because we have to develop the 3-dimenctional drawing
Tip: Use a soft paint brush to remove excess graphite from the tooth of the paper.
Apply more similar layers of shade with HB pencil then use 2B, 4B, 6B and 8B pencil.
Tip: Shade the darker portion directly with 6B or 8B pencil
See step by step illustration in the below images for shading ear.
HB, 4B and 6B pencils can be used to perform the basic shading. Through out the drawing process apply press on the pencils very carefully.
2B , 4B, 6B and 8B pencil can used. Blend the pencil strokes using the soft paint brush or blending stumps.
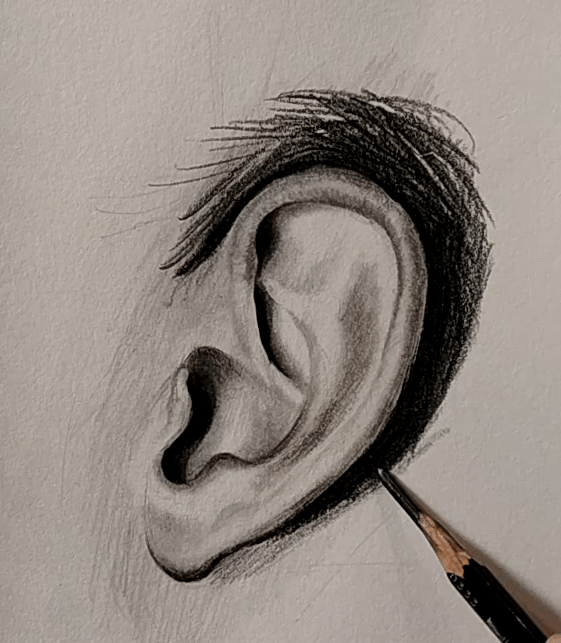
2B, 4B, 6B, 8B pencils and kneaded eraser can be used to develop the complete drawing.
As we practice more, the ear drawing becomes more simple. If you notice in the drawing I have put dark value behind the ear because the darker value will give the 3-dimentional look the ear. In other words, we need to take care of shadows very carefully to achieve a realistic drawing. To develop drawing skill it takes time because we have to practice more and more and in each practice we learn something.
Tip: No one can learn without making mistakes and we learn more if we find our won mistakes.
Watch full video tutorial for better understanding.
To see more such videos, Like and subsribe to the youtube channel: LOV4ARTS